May 152023
 
  1. Finish party budget
  2. Multiplication square
  3. Conditional formatting pixel art

The task

  • Imagine you are organising a class party.
  • You need to buy the food but also cups, plates and serviettes
  • You have a budget of £60
  • Design a spreadsheet which will help you work out the costs and experiment to see what you could buy

Steps to success

  1. Set up your spreadsheet
    • Columns: Item, link, pack size, number, cost, total cost,
    • Rows: headings, a row for each item, Grand total, Money left to spend
    • Formulae: total cost and Grand total, money left
    • ** Add more columns/worksheets to compare different supermarkets
  2. Search for items and enter item, links, pack size and costs in your spreadsheet
  3. Experiment by putting different values in the number cells to see what you can afford
  4. Decide on your shopping list and explain your choices.

How did using a spreadsheet make this easier?

May 182022
 
  • Go to https://www.ilearn2.co.uk/signin-html/
  • Enter the code on the whiteboard
  • Watch the videos (for Chromebooks/Googe Sheets)
  • Follow the instructions
    • Activity 1 Pixelart
    • Activity 2 Tour de France project
  • At the end of the lesson: Fill out the “How did that go?” form

May 092022
 

Activity 1 – Video: What is a mindmap?

Activity 2 – Explore Coggle tools

  • Explore the tools on Coggle by making a mind map called The World
    1. Go to Google Drive
    2. New – more – Coggle
    3. Name the central idea: The World
    4. Add main branches for the continents
    5. Add two countires as next branches for each continent (apart from Antarctica)
    6. Add some more branches – maybe cities or famous things about each country

Video instructions for activity 2

Activity 3 – Mind map from a text

  • Create a mindmap about…

Antarctica

Acrivity 4 – talk it through

The tes of a good min map is if you can use it to tell someone else about the subject or even better use it to remember the facts without having to look at it.

  1. Read your mind map several times
  2. Tell someone about Antarctica including all of the facts using your minmpa as a prompt.
  3. Turn your mind map over and see if you can remember the facts.
  4. Try again in a few days time – can you still remember the facts?

Activity 5 – beautify your mindmap

  1. Tidy up your mind map by dragging branches
  2. Try to make it
    1. compact – no big gaps
    2. fit the screen in a rectangle
  3. Add symbols
  4. Add pictures
    1. In Google
      1. Search for a simple picture – should be very simple, use the word “icon” or “clipart” in your search
      2. Save image as…
    2. In Coggle
      1. When typing, click the picture icon and find your picture on your computer
      2. Change the code at the end to 50×50 so your picture is small
  5. Look at a WAGOLL

Activity 6 – Success criteria

  • Information in correct branches – read your mind map to check it makes sense
  • Branches growing in one direction – not toopy
  • Branching/splitting – not one long line
  • Compact – fits the screen
  • Simple pictures – not photos

Activity 7 – Saving to j2e

  • Click download – image
  • Right hand click – copyvimage
  • Go to a new j2e5 page
  • Make it landscape and 50%
  • Paste – Ctrl-v
  • Make your mindmap as big as possible on your page , crop any spare
  • Save as “Antartica mind map”

Other topics:

The planets

Why are rivers important?

Follow on activities

  1. Add more information, pictures and symbols to you mind map
  2. Create a new mind mpa about another topic
  3. How many of these Coggle tools did you use?
    1. Resize text by dragging
    2. Add and delete branches
    3. Add a picture
    4. Add symbols
    5. RH-click to get branch options

15 Creative Mind Map Examples for Students

Jan 182022
 

1 – What makes an effective information poster

  • A good information posted should show lots of information at a glance.
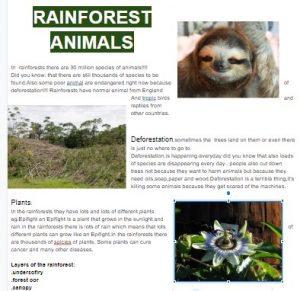
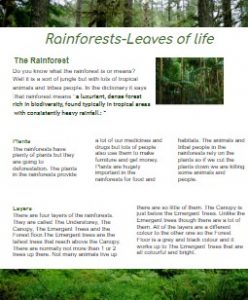
  • Look at these information posters
    • What makes them effective?
    • What would make them better?
  • Find some other effective information posters and make a list of features


 2 – Tools

  1. We are going to explore three tools for making posters:
    1. Google Docs (Go to Google Drive – Create – Googe Docs)
    2. j2e5
    3. j2Office – Writer
  2. Open each of these tools and have a brief explore – what tools are there?

3 – Make an information poster about South America

  1. Here is an information poster that I made on Google Docs
    1. Example Sourth Africa poster
  2. I have saved a file in each tool for you to edit – the text and pictures are all there, you just need to edit
    1. Google Docs – link on Google Classroom
    2. j2Office Writer South America Poster
    3. j2e5 South America Poster

3 Create a j2e5 poster

  • Use the Success Criteria that we have written together
  • Be resilient – don’t be happy with “ok”

4 Make a Google Doc information book page

  1. Go to Google Classrrom (Class 21) – Classwork – South America  Information Page Google Doc
  2. Insert a table in Google Doc to arrange facts and pictures
    1. Make the border lines invisible
    2. Colour the cells
    3. Change width/merge cells
  3. Insert pictures
    1. Put them in different places
    2. Crop – eg banner picture at top/bottom
  4. Style
    1. Choose font, colours (one or two only)
    2. Avoid rainbox, fancy fonts
  5. Information
    1. Keep it simple and short – but informative

5 j2e5 mini book

6 Evaluation

  • Which tool is easiest to use?
  • Which creates the best poster?

Success Criteria 1

  • Bold title
  • Fill the page
  • Stand out
  • Dividing into sections/blocks
  • Pictures/symbols
  • Lots of info

Success Criteria 2 – fine tuning

  • Big (easy to read) font
  • No highlighting
  • Space
  • Balance
  • Centre
Jan 202021
 

The Big picture

We are learning how to use Google Slides (by exploring it ourselves) and how to give an effective presentation talk using our Slides by getting feedback from others.

Choose a WW2 topic – Create a Google Slides presentation – Give a talk using your presentation – Create other information presentations

1 Choose one of the WW2 topics

  1. WW2 planes
  2. The land army
  3. WW2 ships
  4. WW2 tanks
  5. The life of a WW2 soldier
  6. The blackout
  7. The Battle of Britain
  8. Anne Frank
  9. Or suggest a title in the comments and I will get back to you.

2 What different ways can we present information?

  • Let’s make a list.  Later we will list their features and think about how we can create effective examples.

3 What is a “Powerpoint” presentation?

  • Purpose – to show onscreen while you (the expert) talk about the subject
    • Not an ebook – just for people to read, they will be listening to you talk – givign details of what is on the screen
  • Format
    • Simple, clear, clean
    • Notes – not full sentences – it’s not an ebook
    • Just the key information
    • Add speaker notes below the slides for you to remember the extra info that you need to give – but again, don’t write in full sentences – nobady want to hear youread – we want to hear you talk confidently about the subject.

3 Create your presentation in Google Slides

  • In Google Classroom (Class 21), open WW2 slides
  • Explore the tools as you create your presentation
  • 3-5 slides, a few key facts on each slide, pictures, titles
  • Prepare your talking (not reading) – you could write “speaker notes” under each slide

4 Style choices

  • Decide on a font size, font, colour – one or two that work together
  • Use a theme or make sure slides feel part of the same presentation – colours, design, layout

5 Success criteria

  • 3-5 slides; 10-15 key facts
  • Simple layout
  • Consistent theme – on or two colours, fonts
  • Balanced slides – same gaps, margins between elements
  • Clear key information – no sentences
  • Speaker notes if requred to remind you of details not on slides
  • Talk through your presentation fluently with expression

6 Present!

  • Use your presentation to give a 1 minute talk ot your learning partner.
  • Get some useful feedback – don’t settle for “good” – push for comments that will help you improve your Slides and speaking.
    • What went well…
    • Even better if…
  • Go back to your Slides and improve them based on the feedback
  • Give the talk again – was it more effective? Get some more useful feedback…

Finished?

  • Make a new slide on the same presentation
  • Include the information from the whole presentation on that one slide in the stylle of an information poster.
Jul 092020
 

When  you leave, your Google and j2e accounts will be removed.

Want to keep using Google and j2e?

  • If you still want to use these great tools, then you can set up your own accounts (with your parents’ permission).
  • For j2e, go to j2e.com and sign up for a free trial or “sign in with Google” if you have a Google account.  Last time I checked with j2e, they said that it carries on after the “free trial”

Want to keep some of your work?

  • You might want to print or download some of your favourite work from Google or j2e before the end of term.  Please don’t download or print anything involving other people, just your own work.

Questions?

Please use the comments below if you have any questions.

Jan 102020
 

Lesson 1

  1. Check email
  2. Follow link in email  to Google Classroom
  3. Click the link in the comment to go to form and enter your chosen topic.
  4. When groups have been sorted – go to Google Drive, create a new Google Slides.  Share it with your group members.
  5. Decide on one persons Slides and work on that one.
  6. Prepare one slide each
    1. Simple layout
    2. A few notes
    3. A picture or two

Lesson 2

  • Finish own page
  • Communicate online

Lesson 3

  • Agree a style – font size, font,
  • Prepare your talking (not reading)
  • Work to succes criteria (on Google Classroom)